
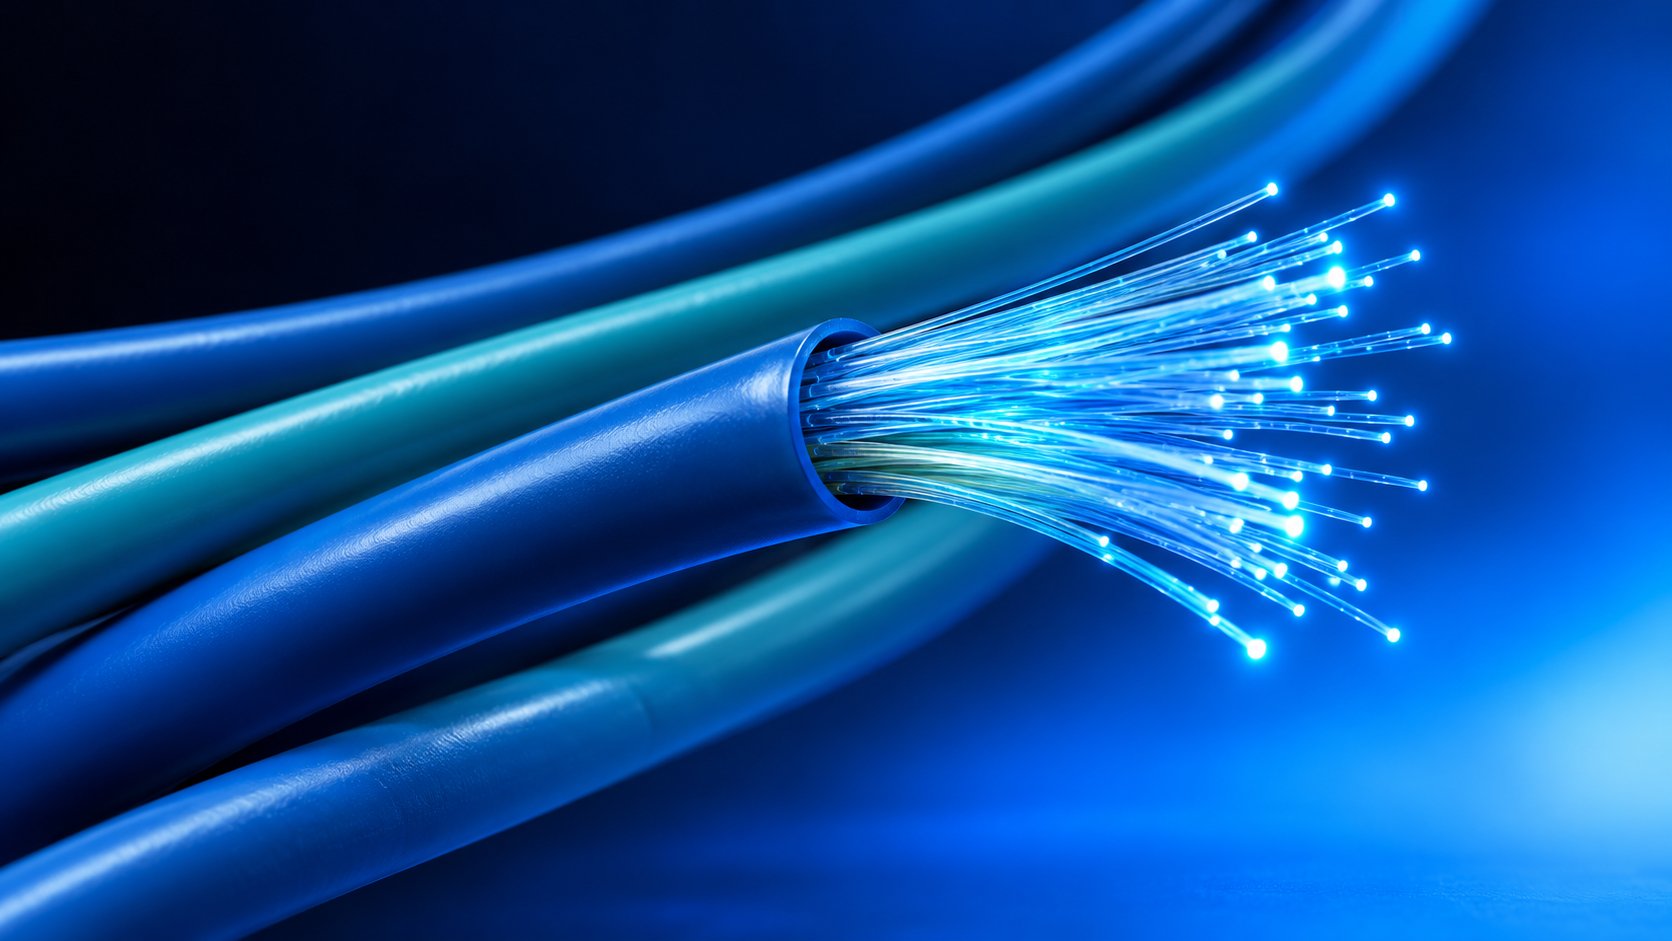
Tight-buffered and loose-tube fiber optic cable protect the same glass in very different ways. This buyer's guide compares construction, termination methods, moisture and temperature behavior, fire ratings, fiber counts and total installed cost, then gives a pre-order checklist and FAQ so B2B buyers can specify the right indoor cable and avoid rework.
Two indoor fiber optic cable inquiries can look almost identical on paper — same fiber count, the same G.652D single mode glass, even the same blue low-smoke jacket — and still behave completely differently once the installation crew opens the boxes. In most cases the difference is not the glass. It is a construction choice that many buyers never consciously make: tight-buffered or loose-tube.
If you source fiber optic cable for telecom operators, ISPs, system integration projects, data centers or in-building FTTH rollouts, this one choice decides how the cable is terminated, what tools your field crew must bring, how the run behaves in a riser shaft, which fire rating the drawing can honestly claim, and how expensive it is to replace a single damaged fiber two years after handover. It also shapes the quotation itself, because the two designs use different materials, different tooling and different amounts of skilled labor.
This guide walks through both constructions the way a buyer should see them: how each cable is actually built, what each design is good at, where each one quietly costs you money, and how to lock the right option into your RFQ before you confirm an order — not after the cable is already on the reel.
Why This Is a Buying Decision, Not an Engineering Footnote
On a datasheet, both constructions can list the same fiber standards, the same attenuation class and the same jacket colors. That is exactly why the difference slips through so many quotations. But the two cables are built around opposite ideas about where the glass needs protection and who carries the mechanical load.
A tight-buffered cable surrounds every fiber with its own 900 µm plastic buffer, then bundles those jacketed fibers directly under aramid or glass yarn and an outer sheath. A loose-tube cable keeps the fibers nearly bare — at their 250 µm primary coating — inside one or more tubes, and pushes all tensile load onto a separate strength member outside the tube. Neither approach is universally better. Each is the economical answer to a different combination of route conditions, termination methods and maintenance expectations.
The consequences land in the bill of quantities. Tight-buffered designs terminate directly with field-installable connectors; loose-tube designs almost always require fusion-spliced pigtails or fan-out kits, which means splicing machines, splice protectors and trained hands on site. On a high-count data center backbone, that difference alone can move the termination budget by more than the cable price itself. Buyers who compare only the per-kilometer cable price routinely discover this on installation day.
There is also a risk dimension, and it is the reason this article exists. When the wrong construction is specified, the problems rarely appear at delivery. They appear during installation: a cable that will not bend where the cable tray turns, a riser run that needs mid-span access nobody planned, a termination crew standing idle waiting for a fusion splicer that was never in the schedule. By then the reel is a change order, and change orders in live projects are never cheap.
So treat the tight-buffered versus loose-tube question as a purchasing decision with three inputs: the route environment the cable will actually live in, the termination method your crew will realistically use, and the fire rating the building code or project specification demands. Nearly everything else in this guide is detail hanging off those three inputs.
What Tight-Buffered Fiber Optic Cable Actually Is
Every optical fiber leaves the drawing tower with a protective cladding and a 250 µm acrylate primary coating. That coating keeps the glass surface from touching anything, but it is far too thin and fragile for direct handling. Tight-buffered construction solves this by extruding a second, much thicker layer of plastic onto each fiber — typically bringing the diameter to 900 µm — so every strand inside the cable is a firm, self-supporting, fingernail-proof unit.
Those buffered fibers are then laid under aramid or glass yarn for strength, wrapped where the design calls for it, and covered by the outer jacket. In a distribution style cable, the buffered fibers sit together in one compact bundle under the single sheath. In a breakout style cable, each 900 µm fiber first receives its own sub-jacket — effectively its own miniature cable — and the sub-units are bundled together under one overall jacket. Both are tight-buffered constructions; the difference is how much handling protection each fiber carries and how easily a single fiber can be fanned out at the patch panel. Breakout designs cost more per meter and are bulkier, but they let a technician route individual fibers to separate equipment without additional sleeves. Distribution designs are slimmer, cheaper and the default for most tray and cabinet work.
The practical properties of tight-buffered cable follow directly from this build. Because the buffer is bonded to the fiber, the cable is flexible, compact and easy to route through trays, conduits and patch cabinets. It tolerates the repeated small-radius handling that would kink a bare fiber, and it survives the practical reality of crowded cabinets where someone will inevitably pull it around a corner tighter than the drawing shows. Installers can strip the 900 µm buffer cleanly with a standard tool and fit a connector straight onto the fiber — no splicing machine, no fan-out hardware, no heat-shrink. For indoor runs that terminate at patch panels, that is the fastest and cheapest way to put glass on a switch port.
The same bonded buffer is also why tight-buffered cable is an indoor animal. The buffer grips the fiber, so any water that finds its way into the cable tends to sit against it rather than drain away, and the construction has no floating-fiber geometry to isolate the glass from the cable's mechanical loads. Standards bodies and cable makers therefore position tight-buffered products for controlled indoor environments: horizontal runs, risers, patch and distribution areas. These are exactly the routes where Nexora's indoor tight-buffered fiber optic cable is applied, alongside its distribution fiber optic cable series for multi-core routing inside buildings and data centers. Temperature windows are correspondingly narrower than outdoor designs — commonly around −20 °C to +70 °C in typical datasheets, though the exact range must be confirmed on the specification sheet of the product you actually order.
One more buyer-relevant detail before we move on. Tight-buffered indoor cable usually ships in shorter standard drum lengths than outdoor loose tube, because it is sold and pulled in building-scale quantities. If your bill of quantities assumes kilometer-long reels, check drum length before comparing unit prices. A lower per-kilometer price delivered on short reels can cost you more in mid-run joints, splice enclosures and logistics than the price difference saved — a trap that catches even experienced procurement teams on multi-building projects.
What Loose-Tube Fiber Optic Cable Actually Is
Loose-tube construction takes the opposite bet. The fiber stays at its delicate 250 µm primary coating — with no bonded buffer — and floats inside a small plastic tube, usually alongside a few other fibers. The tube is either filled with a water-blocking gel or built with dry, water-swellable elements. Around the tubes sits the real skeleton of the cable: a central strength member of FRP (fiberglass-reinforced plastic) or steel, aramid or glass yarn, frequently a water-swellable tape or moisture barrier layer, and finally the outer sheath.
The idea behind the floating fiber is simple, and it matters to buyers even if it never appears on a quotation line. Because the fiber is paid into the tube with a small excess length, it rests at the neutral axis of the cable. Cable tension during a pull, the sheath shrinking in a cold winter, or the daily thermal swing on an outdoor wall gets absorbed by the tube and the strength member — not by the glass. This is why loose-tube is the default answer for outdoor plant, campus ducts and building entrances, and why reputable suppliers will generally steer you away from tight-buffered constructions on those routes.
Indoors, loose-tube construction survives in two places. The first is where the outdoor network enters the building: a gel-free (dry-core) indoor/outdoor loose-tube cable can often run from the manhole or handhole straight through the entry and up to the first frame without a separate transition splice, saving one closure and one splicing session. The second is high-count riser and campus backbones, where a compact tube can carry a substantial number of fibers (commonly up to twelve per tube in typical designs — confirm the exact per-tube count on the datasheet) and the overall diameter stays manageable even at 48, 96 or more fibers.
The trade-off shows up at the patch panel. You cannot strip a 250 µm fiber and crimp a connector onto it. Loose-tube ends are prepared either with fan-out kits — small sleeve assemblies that build each 250 µm fiber up to a handleable 900 µm or 3 mm leg — or, far more commonly in quality-driven projects, by fusion-splicing factory-terminated pigtails. Splicing is reliable and measures well, but it turns every single termination into a splicing operation that needs a machine, electrodes, splice protectors, a clean working surface and a trained hand.
Water protection deserves one more paragraph, because RFQs often handle it carelessly. Gel-filled tubes have decades of field history and remain the mainstream choice for direct-buried and duct applications. Dry (gel-free) designs trade a little of that heritage for noticeably cleaner handling: no gel to wipe off gloves, connectors and splice trays, faster cable preparation, and less mess inside closures. Both are legitimate engineering answers; the specification should simply state which one you want, because "with moisture protection" alone does not settle anything.
Construction Differences at a Glance
| Aspect | Tight-Buffered | Loose-Tube |
|---|---|---|
| Fiber inside the cable | 900 µm buffer bonded onto each fiber | 250 µm coated fiber floating in a tube |
| Who carries the mechanical load | The buffer and cable structure | The strength member; the fiber floats free |
| Flexibility and handling | Very flexible; suits tight trays and cabinets | Stiffer; needs larger, more careful bends |
| Moisture defense | Limited; meant for dry indoor routes | Gel-filled or dry water-blocking; entry and duct capable |
| Termination method | Direct connector installation on the 900 µm fiber | Fan-out kit or fusion-spliced pigtails |
| Typical temperature window* | ≈ −20 °C to +70 °C | ≈ −40 °C to +70 °C |
| Rework after fiber damage | Swap or re-terminate the connector | Open the tube, re-splice a pigtail |
| Best-suited routes | Horizontal runs, risers, cabinets, data centers | Building entry, campus ducts, high-count backbones |
*The temperature figures above are typical industry ranges used for comparison. They are not guarantees and not purchase commitments; the specification sheet of the exact product you order always prevails.
Read the table top to bottom and you will notice that no row is a score. The two constructions simply answer different questions. If water will never reach the cable and the crew terminates at panels, the tight-buffered design removes an entire category of tooling from the project. If the route crosses a wet, cold or mechanically harsh environment, or if the fiber count runs high, the loose-tube design protects the glass in a way a bonded buffer physically cannot.
There is also a density point that matters on crowded routes. Loose-tube constructions pack more glass into a smaller cross-section at high counts, which is why 96-fiber and 144-fiber indoor backbones are almost always loose-tube. Below roughly 24 fibers on ordinary indoor routes, tight-buffered distribution cable is usually the more compact and more economical option. Neither boundary is a law — they are the crossover zones where comparing both constructions in your RFQ starts to pay for itself.
Termination Is Where the Two Designs Diverge Most
Construction differences on a datasheet are abstract. Termination is where they become labor, equipment and schedule — which is why a buyer should understand this section better than any other.
On a tight-buffered cable, termination is direct. The installer strips the 900 µm buffer, cleans the 250 µm fiber, cleaves it, and fits a field-installable connector — SC, LC, FC or whatever the panel needs. With modern mechanical or quick connectors, a trained technician completes a fiber in a few minutes using hand tools only. Quality control is straightforward: test the completed link with a light source and power meter, or an OLTS set, against the insertion loss and return loss targets in the project specification. If a connector fails, you redo one connector, not one cable section. For patch-panel-heavy projects — office horizontal cabling, data center cross-connects, equipment rooms — this is the shortest possible path from reel to working port.
On a loose-tube cable, every termination is a splicing job by default. The standard quality approach is to fusion-splice a factory-terminated pigtail onto each fiber: the pigtail arrives with a connector already polished and factory-tested on one end and bare fiber on the other, so the only field variable is one splice per fiber. Fusion splices routinely land in the neighborhood of 0.1 dB or better when done by a competent operator — a typical industry figure, not a promise — and the splice is protected with a heat-shrink sleeve before it is parked in a splice tray. The alternative, fan-out kits plus field connectors, avoids the splicer but adds sleeves, storage and its own failure modes, and is generally chosen when no splicing machine is available on site.
Now look at how the money flows. In a tight-buffered project, the cable is the main purchase and the termination is a modest labor line. In a loose-tube project the relationship flips: the cable itself may be cheaper per fiber, but the project adds fusion splicers (owned or rented), splice-on pigtails, splice protectors, closure time and splice labor for every fiber, plus acceptance testing across the spliced links. On a 144-fiber backbone the arithmetic is unambiguous. Buyers who inherit such projects without the splicing line in the budget end up negotiating for it mid-project — from a weaker position than they started with.
One practical middle path deserves attention: decide where the construction changes hands. Many well-run projects pull loose-tube cable to a building entry or an intermediate frame, then continue in tight-buffered distribution cable to the panels. The splice work is concentrated at one planned, equipped location instead of being spread across every floor. That single routing decision usually buys back most of the labor cost difference — but only if it is decided at specification time, because after award, the cable is already on the truck.
Whichever path you choose, the quality of the finished end face is where performance actually lives. Insertion loss and return loss targets for the completed links belong in the RFQ, together with the polish type (UPC or APC) and the test method. Our earlier guide on reading fiber optic patch cord specifications explains those parameters in detail, and the same logic applies to field-terminated ends — the difference is that with pigtails, most of the risk moves upstream into the factory, which is exactly what a buyer wants.
How Each Design Handles Moisture, Temperature and Mechanical Stress
Water is the clearest dividing line between the two constructions. Loose-tube designs attack moisture on several fronts: the tube itself is gel-filled or fitted with dry swellable elements, water-swellable tapes block migration between layers, and some designs add an aluminum or steel moisture barrier under the sheath. A tight-buffered cable has none of this machinery, and it is not designed to need it — the assumption is a dry, conditioned indoor environment. Put a tight-buffered cable in a flooded duct and you have specified a failure you will own, not the supplier.
Temperature works through the same geometry. The floating fiber of a loose-tube design tolerates the expansion and contraction of a long outdoor wall, a rooftop tray or an unconditioned riser far better than a bonded buffer can. Typical published ranges place indoor tight-buffered products around −20 °C to +70 °C and loose-tube outdoor products around −40 °C to +70 °C, with premium arctic or desert variants extending beyond. Treat these as orientation figures only: the datasheet of the specific product governs, and in extreme climates the datasheet should be part of the purchase decision, not an attachment to it.
Mechanical strength is distributed differently, and buyers benefit from knowing why. In loose-tube cable the strength member — FRP, steel, or aramid yarn — carries the pull, which is why outdoor loose-tube designs are routinely specified with short-term tensile ratings in the kilonewton range and crush resistance figures of a few thousand newtons per decimeter; the exact numbers must always come from the datasheet of the cable under evaluation. A tight-buffered indoor design carries far more modest ratings, which is appropriate: nobody is pulling it through a duct with a winch. The mistake to avoid is comparing the two on absolute numbers — a lower crush rating on an indoor cable is not a quality problem if the installation route never produces such loads.
Bend radius behaves in the opposite direction and surprises many buyers. Because each fiber is jacketed in 900 µm plastic, a tight-buffered cable usually tolerates tighter installation bends than a loose-tube design of comparable diameter, which is one reason it is preferred inside cabinets and around corners. Typical guidance for either construction — on the order of ten to twenty times the cable outer diameter, tighter when static than during the pull — is a rule-of-thumb range; the datasheet's figures are the ones your method statement should cite. If your route forces tight, repeated bends at the working end, that is also a reason to look at bend-optimized fiber classes rather than only at cable construction.
Attenuation, finally, belongs to the fiber class rather than the cable construction, but quotations should still pin it down. Standard G.652D single mode fiber is commonly specified at or below roughly 0.36–0.40 dB/km at 1310 nm and roughly 0.22–0.30 dB/km at 1550 nm, and laser-optimized multimode OM3/OM4 fiber is commonly specified around or below 3 dB/km at 850 nm. These are typical industry windows for orientation; the reels you order must be accepted against the values printed in their own datasheets and the factory test reports that ship with them. A supplier who cannot produce those reports for every reel is telling you something important.
Fire Ratings and Jacket Materials You Must Match to the Route
Indoor cable selection is also a fire-safety compliance decision, and the construction choice intersects it. In North American practice, cables are classified by route: general purpose, riser (OFNR) and plenum (OFNP), with plenum designs using jackets that limit flame spread and smoke in air-handling spaces. In international and European practice, the IEC 60332 series distinguishes single-cable flame spread (60332-1) from bunched-cable scenarios (60332-3), and low smoke zero halogen (LSZH) jackets are specified through companion standards such as IEC 60754 for halogen content and IEC 61034 for smoke density; the EU Construction Products Regulation adds Euroclass ratings for permanent building installations. The exact scheme your project follows depends on the country and the client specification, so name it explicitly rather than assuming the supplier will guess it.
Both constructions exist across these fire ratings — tight-buffered riser and plenum cables are standard catalog items, and so are LSZH loose-tube designs — but the jacket material interacts with the construction in ways worth knowing. LSZH compounds are generally stiffer than PVC, so an LSZH tight-buffered cable bends slightly less freely than its PVC equivalent, and LSZH loose-tube designs are typically dry-core to avoid handling gel in occupied buildings. None of this changes the selection logic; it just means the fire rating, the jacket material and the construction should be specified as one coherent line item, not three separate checkboxes that a quoting desk can resolve independently of each other.
Buyers who want a deeper treatment of the jacket question — what LSZH actually guarantees, where it matters most, and how it trades against PVC — will find it in our dedicated article, What Is LSZH Fiber Optic Cable and When Should You Specify It?. The short version for this guide: specify LSZH where people evacuate through the cable route, specify plenum or riser ratings where the code demands them, and make the certification evidence part of the delivery documents.
A small practical note that saves arguments on site: jacket colors follow widely used conventions — yellow for single mode, orange for OM1/OM2 multimode, aqua for OM3/OM4 — but they are conventions, not standards, and they are not a substitute for the printed legend on the cable. The print line, applied every meter on most quality cables, is what carries the fiber class, the fire rating, the manufacturer and the date. Ask for a sample print photo when you approve pre-production samples; it is the cheapest compliance check in the entire process.
Fiber Counts, Subunits and Spare-Fiber Planning
Construction and fiber count are independent decisions, but they interact, and the interaction is where over- and under-buying both happen. Tight-buffered distribution cable is commonly offered from 2 up to 48 fibers and beyond, with the bundle growing fatter as the count rises; Nexora's distribution series, for example, covers 2–48 core options in G.652D single mode or OM3/OM4 multimode with a tight-buffered or loose-tube internal option, LSZH jacket and easy-branching geometry for indoor routing. Loose-tube designs scale further, because a handful of tubes can carry large counts in a sheath that remains practical to pull.
The counting rule that protects buyers is simple: count today's demand, count tomorrow's likely demand, and order the difference as spare fibers. A frequently used planning convention reserves twenty to thirty percent of the fibers as dark spares for future tenants, new equipment rows or damaged-fiber re-routing. That convention is practice, not a standard, and every project tunes it; the point is to make the spare decision consciously, because adding fibers to an order is cheap, while adding fibers to an installed cable is impossible. Our earlier article on choosing the right fiber count walks through this in more detail.
At high counts, also think in subunits, not just totals. Breakout tight-buffered cables give each fiber a sub-jacket, which is convenient when individual fibers fan out to separate devices; subunitized loose-tube and distribution designs group fibers into colored, numbered units so a technician can trace a twelve-fiber group without peeling the whole bundle. Color coding and unit printing conventions exist across the industry, but they vary by manufacturer, so the RFQ should ask for the exact coding chart — and the delivered cable should carry meter marks and unit identification that match what was quoted. When your crew can find fiber 37 in ninety seconds instead of thirty minutes, the spare fibers actually get used instead of being left dark forever.
Matching the Construction to Common Project Types
General principles become useful when they are pinned to real project types. Here is how the choice usually lands across the routes B2B buyers actually procure for — with the reminder that every project's final answer belongs to its drawings, not to a guide.
Office horizontal cabling and floor distribution. Tight-buffered distribution cable, typically 2 to 24 fibers, LSZH jacket, terminated directly at wall outlets, consolidation points and floor patch panels. Direct connectorization wins here because the terminations are numerous, accessible and low-stakes individually. This is the classic home ground of tight-buffered construction.
Riser backbones inside a building. Both constructions appear. Low to mid counts in a dry, conditioned riser often stay tight-buffered with a riser fire rating; high counts, or risers that pass through damp or unconditioned shafts, favor loose-tube. The deciding questions are moisture exposure and count — not fashion.
Data centers. Inter-row and cross-connect runs inside the white space are tight-buffered territory, frequently in pre-terminated form; high-density trunks between halls are usually factory-terminated MPO/MTP assemblies rather than field-terminated anything, which is a separate procurement discipline covered in our MPO/MTP patch cord guide. Where a data center receives carrier entries from outside, those entries are loose-tube and meet the inside plant at a designed transition frame.
Building entry and campus runs. Outdoor loose-tube cable — duct, direct-buried or armored as the route demands — up to the entry point, then either a transition splice or a gel-free indoor/outdoor loose-tube run to the first frame. The transition point should be planned as a real location with splice enclosure space and access, not discovered by the installation crew.
Industrial floors and plants. Loose-tube with armoring, gel or dry depending on environment, routed away from heat and vibration sources where possible. Tight-buffered cables appear inside control cabinets over short, protected distances. The mechanical loads and the wash-down or chemical exposure decide the sheath, and the datasheet decides the details.
In-building FTTH. The drop and horizontal legs use dedicated drop cable and bend-optimized fiber, covered separately in our guides to FTTH drop cable selection and bend-insensitive cable for FTTH. Inside buildings, however, tight-buffered distribution cable still carries risers and frame connections, so the same construction logic applies one level above the drop.
Notice the pattern across all six: tight-buffered wins wherever the environment is dry and the terminations are many and accessible; loose-tube wins wherever water, distance, high counts or mechanical loads enter the picture. Most real networks contain both, joined at a planned transition point. Specifying that point deliberately is one of the cheapest engineering wins available on a project.
Cost, Lead Time and Total Installed Cost
Cable pricing follows the glass, the count, the sheath and the certifications. Beyond that base, construction shifts the total in two directions at once: tight-buffered cables generally carry a modest premium per meter over bare loose-tube designs of the same count, because each fiber is individually buffered; loose-tube projects then add back splicing hardware, pigtails, consumables and labor at every termination. Neither design is "the cheap one" in the abstract — the installed cost is the only honest comparison, and it swings with how many terminations the project has and who performs them.
Lead time behaves similarly. Standard constructions in standard counts and jackets move fast because factories run them continuously; custom counts, unusual jackets, armoring variants or certification-heavy builds extend the schedule. As a planning reference rather than a promise, standard indoor constructions are commonly quoted in the range of two to five weeks with minimum order quantities from a few kilometers, while engineered builds are scheduled against the specification — figures of this kind are typical industry planning ranges, and your supplier's confirmation for the exact configuration always prevails. Nexora runs twelve production lines with a monthly capacity in the hundreds of thousands of units and thousands of active configurations, which is what makes mixed-construction orders — some tight-buffered, some loose-tube, one delivery window — practical to schedule on a single project.
Two cost lines that buyers routinely forget deserve their own sentences. First, tooling: if the project has no fusion splicer and the design needs one, either the schedule or the budget will grow, so resolve it at award time. Second, testing: acceptance measurements are part of the deliverable, not an optional extra; budget the time for OTDR or OLTS testing of every fiber you paid for, dark spares included, because an untested spare fiber is an assumption, not an asset.
Finally, protect the commercial side the way you protect the technical side. Confirm the warranty terms in writing before award — Nexora, like the industry norm, backs its cable products with a 12-month warranty from shipment date, and the claim path works far better when reel labels, drum packaging and factory test reports are preserved from delivery day. Those documents cost nothing to keep and are decisive if a fiber ever needs a warranty evaluation.
A Practical Checklist Before You Confirm the Order
Everything above compresses into the following list. Work through it line by line before signing the order, and any supplier worth the award will answer it without friction.
- Name the construction explicitly. "Indoor fiber optic cable" is not a specification. Write tight-buffered distribution, tight-buffered breakout, gel-filled loose-tube, or dry-core loose-tube — and indoor/outdoor where the route crosses the building envelope.
- Classify every route segment. Dry conditioned indoor, damp riser, building entry, outdoor duct or buried. The segment list drives the construction split and the transition points.
- Pin the fiber class and grade. G.652D single mode, or OM3/OM4 multimode, with the attenuation window taken from the datasheet — not from this article, and not from memory.
- Specify the fire rating by name. OFNR, OFNP, LSZH to IEC 60332-1/-3 with IEC 60754 and IEC 61034, or the Euroclass the project requires, and ask which evidence accompanies delivery.
- Fix the fiber count and the spare policy. Count today's demand, agree the spare percentage, and record both so the next phase inherits a documented decision.
- Decide the termination method and who performs it. Direct connectors on tight-buffered ends; pigtails and a splicing plan on loose-tube ends; the splicing line item enters the budget at award, not mid-project.
- Confirm drum lengths and packaging. Match reel lengths to the route plan so mid-run joints are choices, not accidents, and require meter marks and printed legends on every reel.
- Require factory test reports per reel. Attenuation, and geometrical or screening data where the project cares; reports ship with the reels and anchor both acceptance and any later warranty discussion.
- Agree warranty terms in writing. Nexora supplies its cable with a 12-month warranty from shipment date; keep the reel labels and delivery documents so a claim, if it ever comes, takes days instead of months.
- Attach the datasheet to the order. Every performance figure used in design — temperature, bend radius, tensile, crush, attenuation — should trace to the datasheet of the exact product ordered. Typical values in guides like this one are for orientation; the datasheet prevails.
Five Mistakes That Show Up After Installation
Buying "indoor" cable for the entry route. A tight-buffered cable pulled through a damp duct or up an unconditioned shaft is the single most common mis-specification we hear about from buyers. The failure is not immediate, which makes it worse: the cable passes acceptance, then ages in an environment it was never built for.
Budgeting termination like copper. Fiber terminations on loose-tube cable are splices, with machines, consumables and skilled labor attached. Teams that plan termination as a corner-case activity discover the true cost in schedule slips, not in invoices — which is harder to escalate.
Leaving the fire rating to chance. An unspecified jacket defaults to whatever is cheapest to quote, and it surfaces at inspection or during an audit of the as-built documentation. Naming OFNR, OFNP or the LSZH scheme in the RFQ costs one line and prevents the entire conversation.
Ignoring bend radius in crowded trays. Loose-tube cable needs gentler handling than its diameter suggests, and installation crews under time pressure find out. A method statement that quotes the datasheet's bend figures — and a supervisor who owns them — is cheaper than re-pulling a backbone.
Ordering exact-count cable with zero spares. The day a tenant wants two more fibers, or a technician breaks one during a move, the options are ugly: overpull, new cable, or an emergency order with emergency freight. Spare fibers ordered on day one are the cheapest insurance in the entire bill of materials.
Frequently Asked Questions
Can tight-buffered cable ever be used outdoors?
Only over short, protected, effectively dry runs — for example, a few meters between an equipment shelter wall and the rack inside it — and only if the product's datasheet permits the temperature and exposure. For anything that crosses outdoors or enters a wet route, use a loose-tube indoor/outdoor or outdoor design and plan the transition indoors.
Can I terminate loose-tube cable directly with field-installable connectors?
Some connectors accept 250 µm fiber, but this is not the mainstream practice for quality installations. The standard approach is a fan-out kit or, preferably, fusion-spliced factory pigtails, which move the connector quality upstream to the factory and leave one splice per fiber as the only field variable.
Which construction is cheaper?
The honest answer is: cheaper to buy and cheaper to install are different questions. Tight-buffered usually costs more per meter but terminates with hand tools; loose-tube is often cheaper per fiber at high counts but adds splicing hardware and labor. Compare installed cost on your project's real termination count — that number decides it.
How much spare fiber should I order?
A common planning convention is twenty to thirty percent of the fiber count held dark for growth and re-routing, tuned per project. It is practice rather than a standard; the essential thing is to decide it consciously at order time, because installed cable cannot take more fibers later.
Gel-filled or dry (gel-free) loose-tube — which should I specify?
Both are legitimate. Gel-filled has the longest field heritage and excels in direct-buried and duct environments; dry-core designs prepare faster, keep closures and connectors clean, and are the usual choice for indoor/outdoor runs and occupied buildings. State which you want and hold the delivered cable to it.
What warranty and documentation should come with the cable?
Expect a written warranty — Nexora's cable products carry a 12-month warranty from shipment date — together with reel labels, printed legends and factory test reports for each reel. Those documents are the evidence base for acceptance testing and, if ever needed, a smooth warranty claim.
Can one supplier cover both constructions and the accessories?
Yes, and it simplifies projects more than most buyers expect. Nexora manufactures fiber optic cables across indoor tight-buffered, distribution, outdoor, ADSS, figure-8 and FTTH drop constructions, plus patch cords, pigtails and adapters, with OEM/ODM support for custom counts, jackets and printing — so the transition points in your network can be engineered and delivered as one coherent order.
The Bottom Line
Tight-buffered and loose-tube fiber optic cables protect the same glass in opposite ways, and the right answer falls out of three questions every buyer can ask before award: Is the route dry? Who terminates, and how? What does the fire code call for? Answer those, name the construction in the RFQ, and the quotation you receive becomes comparable — often for the first time.
If your current project mixes indoor routes with building entries or campus runs, the strongest position is a supplier who builds both constructions to the same quality system and can schedule them in one delivery. Nexora has manufactured fiber optic cable and connectivity products in Shenzhen since 2014, with a 16,000+ m² facility, 180+ employees, 3,500+ product configurations and more than 500 completed OEM/ODM projects delivered to customers in over 50 countries — and every cable ships with a 12-month warranty from shipment date.
As a next step, review the indoor tight-buffered fiber optic cable and distribution fiber optic cable pages for current configurations, then send the Nexora sales team your route list, fiber counts, termination plan and fire-rating requirements. A quotation built on those four inputs will compare cleanly against any alternative — and the cable that arrives will be the one the drawings expected.